This article contains How to Clean Paintball Guns ( The Ultimate Guide ). This is a complete guide for paintball gun cleaning. Do you know Cleaning your paintball guns is probably the most boring and time-consuming task you’ll ever undertake?
It may be tedious on How to Clean Paintball Gun, but it is an important task. Since the guns used in this sport are so delicate, you’ll need to take special precautions when maintaining them. Fortunately, we’re here to provide you with a few pointers that will greatly assist you in this regard.
Regular maintenance not only extends the life of your paintball gun but also improves its efficiency. Paintball guns, like any other firearm, can jam. Imagine you’re in the middle of an intense paintball match, and just as you’ve zeroed in on your goal, you hear an ominous “click” indicating that the ball won’t come out.
Simultaneously, it is important not to overlook this mission. The efficiency and overall lifespan of a gun are determined by how well it is maintained on the ground. Paintballs can burst inside the barrel if you don’t rinse your gun for a long time.
If you wait any longer, you will have to spend your hard-earned cash on new pieces. By taking proper care of your marker, you can easily avoid this expense. You don’t want to be the owner of a gun that jams often or gives you incorrect results.
It can also have an effect on the motivation of other players on the field. Your gun will work precisely and optimally by simply washing it. However, how you polish your marker is extremely critical.
Each paintball marker is unique and necessitates its own cleaning method or supplies. To do the job correctly, the procedure is simple and straightforward.
How to Clean Paintball Gun – Paintball Marker
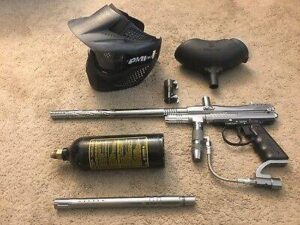
Step 1: Disconnect the CO2 or air tank. ( Cleaning Paintball Guns – Paintball Marker )
To start, take out the CO2 canister. Alternatively, if your gun came with a CO2 tank, you should take it out in the same way. The key reason this should be your first move is for your own protection. Compressed air can unintentionally shoot, causing damage to your paintball gun or, worse, injuring you.
Every paintball gun air tank has a simple ‘detach’ button; the most important thing to note is to never press it. Since each paintball gun is unique, you can refer to the owner’s manual for instructions on how to remove the CO2/Air canister.
When it comes to cleaning your paintball marker, safety should always come first. Remove the CO2 or air tank before beginning this procedure. It will keep any possible harm or fire from happening.
Double-check that the tank is still fully sealed after you’ve securely emptied it. Before you remove it, make a mental note of where it was screwed in and how securely it was secured.
Remember that if you don’t remove the air tank, you’re taking a risk of serious injury to yourself and others. The degas feature on your gun will most likely be simple to use.
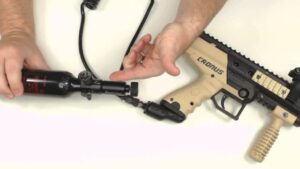
Step 2: Take your paintball gun apart ( How to Clean Paintball Gun )
Disassembly of your paintball gun is the second move. This is, without a doubt, one of the most difficult parts, and tackling it will take some time. We advise you to proceed with caution and accuracy. Let’s not forget that paintball guns are typically flimsy and easily damaged or broken.
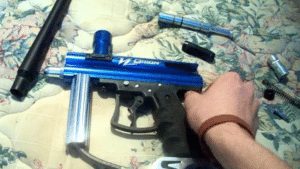
The hopper, bolt, barrel, and grip are the components you’ll be disassembling. Despite the fact that you can do it in any order you want, it is strongly advised that you consult the manual for detailed instructions.
You’ll use the marker schematics here. All, including the hopper, bolt, barrel, and grip frame, must be disassembled correctly.
By carefully disassembling the guns, you can arrange them so that you can easily reassemble it later.
Once you’ve disassembled all of the components, make a point of organizing them in front of you; it’s easy to lose track of any of them if you’re unfamiliar with them.
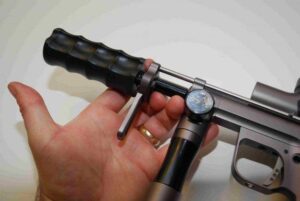
Step No 3: Cleaning The Barrel ( How to Clean Paintball Gun )
You should start cleaning your paintball gun from here, just like police officers and soldiers do with their guns. The procedure is easy, but if you’re not careful, you might make a mistake.
Checking the barrel out is the first step in the scrubbing process. Rinse the visible dirt off the outside and wipe the small dust particles with a barrel swab. Don’t forget to double-check that the barrel is clean and free of contaminants.
You should use a squeegee if the area is already polluted. Pull it with one end like a hook on the rings. Any remaining debris in the barrel will be cleaned out. Place the barrel sideways after that.
Clean any debris that has gotten trapped in it with water. Rep the procedure as many times as necessary until you’re certain your paintball gun’s barrel is free of larger debris chunks. Use a swap to clean away the dust after you’ve finished this operation. Even though dust isn’t nearly as dangerous as actual debris, it can have a major impact on your gun’s output.
The barrel cleaning procedure should now be complete, but double-checking is still a good idea. To peer down the barrel, you can use a torch or a flashlight. You’ve washed it well if the texture is smooth and gleaming.
Step No 4: Cleaning The Body ( How to Clean Paintball Gun )
Check the gun’s instructions to see if you can clean it with a towel. To enter choked areas of the gun quickly, use a Q-tip or a toothbrush. That way, you can clean and clear the gun carefully to avoid jamming.
The type of cleaning tool you’ll use to clean the body of your paintball gun is largely determined by the materials used in its construction. Waterproof fabrics are used in some versions, but not in others. Even if we presume that all paintball guns are impervious to water damage, the reliability of each tool can decide which tool is best suited for the job.
We recommend that you read the directions that came with your paintball gun once more. However, most versions can be washed with a dry cloth.
You’ll have some difficulty getting to a few of the tight spots. To get to those hard-to-reach choked spots, use a toothbrush. You should be as careful as possible with this procedure. When arms jam, these hard-to-reach areas are usually the first suspects.
Step No 5: Cleaning The Bolt And Hammer ( Cleaning Paintball Guns – Paintball Marker )
Your paintball gun’s bolt and hammer are two of the most fragile components that need special care. They deteriorate over time, and only routine maintenance will slow down the process. If you find significant harm, don’t be alarmed; removing the bolt and hammer is usually very inexpensive.
Polish the bolt and hammer with a paper towel before drying. Examine the O-Rings to see if they show any signs of wear and tear. With routine cleaning, minor wear can be fixed. However, if the components are severely damaged, you will need to replace them.
As you gain more experience cleaning your paintball gun, you’ll learn how to take better care of each part.
A plain paper towel should be used to clean the bolt and hammer. Dry the pieces after polishing them with care and gentleness. While you’re at it, take a look at the O-rings for any possible harm.
Step No 6: Cleaning the O-Rings ( Cleaning Paintball Guns – Paintball Marker )
Almost by design, the O-rings are small, thin, and flimsy. If you’re washing your paintball gun for the first time, don’t be discouraged if you totally wreck it. After all, O-rings are extremely inexpensive and can be purchased in large quantities at ridiculously low prices.
There’s no way to keep these rings for a long time; even if you’re extra careful about how you use and clean your gun, they’ll break after a while.
If they’re still functional, cleaning them is a simple and straightforward method. Clean them gently with a dry cloth to remove any dirt or dust. If they aren’t, removing them may be a difficult task.
It’s worth noting that O-rings come in a variety of shapes and sizes. To determine the proper size, first, consult the user’s manual. After you’ve found suitable replacements, lubricate the valve assembly of your paintball gun before slipping your new O-ring into the grove.
You can clean any debris from the grip frame with a Q Tip. Remember not to disassemble the trigger assembly because reassembling it can be difficult. Until you leave your gun unbroken, you can have an impact on its functionality. Clean the grip frame as soon as possible, then dry it thoroughly and double-check it.
Step No 7: Battery Inspection and Replacement ( Cleaning Paintball Guns – Paintball Marker )
Since some beginners are unaware that their paintball gun has batteries, they are often ignored during the first maintenance session. Obviously, these are the cheapest paintball gun bits, and they will run out of juice in no time.
Even if almost everyone knows how to replace a collection of batteries, you can check the manual to see what kind of bats your gun uses. Certain models use rechargeable Li-Ion batteries, which you don’t have to discard even though they’re fully dead.
If they’re regular, non-rechargeable batteries, all you have to do now is figure out the kind (and size) you’ll need.
Recognizing the real danger posed by leaking batteries is the most critical part of battery maintenance. Liquid electrolyte is commonly used in batteries. This is essentially a mixture of water and corrosive sulphuric acid.
Despite the fact that most batteries are well encased and secured, we recommend wearing gloves just in case. Sulphuric acid has the potential to melt your gun and seriously harm you, so proceed with caution.
Obviously, you don’t want your gun to stop working in the middle of a game, causing you to lose all interest. It’s important to keep your paintball gun in good working order.
If you find a defective component, make sure to inspect it thoroughly and replace the battery if necessary.
Step No 8: Damage inspection ( Cleaning Paintball Guns – Paintball Marker )
Harm inspection is one of the final phases in the paintball gun repair process. Basically, you can double-check anything to make sure you haven’t overlooked anything. Screws and O-rings, for example, are small and easy to miss.
This move requires you to inspect your gun thoroughly and check for any specifics that need to be repaired or replaced. If your O-rings have dried out or have been damaged, you must replace them right away.
Remember that O-rings play an important role in paintballing, so make sure they’re in good working order to improve your success on the playing field.
It’s critical to double-check the manual if you depend on online “how-to” instructional guides and videos. Instructional guides almost always apply to general cleaning and maintenance procedures; if you own a specific paintball gun model, they would be of no use to you.
Check every aspect of your gun carefully, then refer to the user’s manual to make sure you’ve done it correctly. Check that all of the screws are in place and, if possible, repair any replaceable parts.
If you find any significant harm to any of the larger pieces, don’t mess with them unless you’re sure you know what you’re doing. It is also preferable to have your paintball gun repaired rather than risk more damage by attempting to repair it yourself.
After that, look over the insides and inspect the screws and cords. If necessary, you may replace them. Make every effort to keep your gun from breaking down in the middle of a game.
Step No 9: Lubricate and oil the Paintball marker ( Cleaning Paintball Guns – Paintball Marker )
You’ve largely cleaned all of the paintball gun’s pieces with water by now. The mechanism of these guns, on the other hand, needs a certain amount of lubrication or it will malfunction.
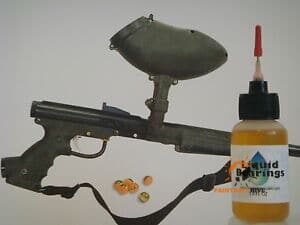
It’s time to lubricate your marker now that you’ve cleaned up every part of the gun. You can also use a special oil made specifically for this purpose; otherwise, your marker would be damaged.
Consider reading a user manual to help you choose the best form of oil for your needs.
Step No 10: Put the paintball gun back together ( How to Clean Paintball Gun )
It’s safe to reassemble everything in an orderly manner now that you’ve scrubbed and oiled your guns. Follow the instructions carefully so you can reassemble it with the screws.
This move should be taken slowly and carefully, as a single mistake could result in the loss of your favorite paintball gun.
The final step in the cleaning process is to reassemble the paintball gun. All you have to do now is reassemble the bits, which are perfectly arranged and oiled right in front of you. Now, if you’re a novice, you’re probably not going to know any of the steps by heart, so keep your instruction manual handy.
The reassembling procedure is almost identical to the disassembling procedure. Replacing the batteries should be the first step, followed by reinstalling the air canister.
It is highly recommended that you take this step as slowly as you possibly can. There are so many bits and pieces (including all the hardware parts) that even some experienced players still don’t know how to do it without sneaking a peek in the user’s guide.
Bear in mind that even a slight blunder can lead to the loss of your gun. Allow yourself as much time as you need, and above all, don’t put things into place.
If a part (or parts) won’t fit back into the frame for whatever reason, stop the reassembly phase right away and take your paintball gun to a professional.
Regular Paintball Maintenance ( How to Clean Paintball Gun )
In addition to the regular cleanings that are needed to keep your gun in good working order, it is also critical to store it properly. If you store your gun as we suggest below, you can greatly reduce the chances of any damaged parts affecting its efficiency.
Once you’ve removed all of the inside components, you can concentrate on the marker’s exterior. A squeegee can be used to polish the outside of your guns. To stop any jamming and to purify the whole body, follow up with a toothbrush.
Warm water may also be used to break down any remaining residue. To do so, soak the toothbrush in warm water and scrub the clogged areas with it. Brush your guns carefully, making sure there are no blemishes. Remember to wash any leftovers that may cause jamming.
The ten measures we’ve covered so far are referred to as “absolute maintenance.” You might do it once a week or once a month, but not more often than that. Given how much time and effort it takes, once a month is perfectly acceptable.
Regular inspections, rinsing, and partial lubrication are all part of routine maintenance. You just need to disassemble a few of the gun’s components, such as the barrel and canister, for example. You can also only lubricate the bits that you remove.
Since batteries and O-rings are the least robust parts of a paintball gun, we recommend checking on them as much as possible. As previously mentioned, they are reasonably priced, so you can stock up ahead of time.
Using a small toothbrush to clean the gun’s exterior and complicated hard-to-reach areas. The gun’s exterior has an impact on its performance as well, but to a lesser degree.
Certain paintball guns (made in a more complicated manner) have particularly delicate nooks that are difficult to reach with smaller toothbrushes. In these situations, most people tend to use Q-tips or cotton swabs.
Warm water should not be used to polish paintball guns’ exteriors; instead, lukewarm water should be used. You can also check the manual to see what chemicals you can (and can’t) use for your particular paintball model. Using paper towels will not damage your firearm, regardless of the model.
Even if you always use special gloves during paintball matches, sanitize the grip of your paintball gun. You’d be shocked by how many germs you might pick up outside; even the cleanest, best-preserved gloves aren’t always as clean as they seem.
The sanitation procedure is easy. If you’ve figured out which chemicals you can use on your guns, dilute them in lukewarm water and apply to your gun with a sponge. After rinsing the grip gently, pat it dry with a towel.
Paintball Gun Storage ( How to Clean Paintball Gun)
Regular maintenance is just as critical as having enough storage. Here are a few pointers to help you better organize your paintball gun storage:
- Before storing your paintball gun, make sure it’s empty.
- Remove and refill the air/CO2 canister.
- Clean and lubricate the hardware (pins, screws).
- Keep an eye on the safety lock to make sure it’s still on.
- Lock the case in which your paintball gun is held.
- Even if the gun is unloaded and put away, keep the kids away from it at all times.
- Separately store the ammunition and the firearm.
Cleaning your paintball marker after a few days or weeks can be difficult, but it shouldn’t be avoided. You should clean your gun correctly and more regularly to ensure that it is in good working order. This ensures that it will last a long time and work flawlessly.
As soon as possible, begin proper cleaning your paintball marker.
Oliver has been a paintball enthusiast since he first stepped on the field at just 11. He quickly joined clubs and teams all throughout New Hampshire! He started Paintball Hive to share his passion and knowledge with other paintball heads out there!
Pingback: Best Paintball Guns Under $200
Pingback: Best Paintball Guns of 2021 | PaintBall Hive
Pingback: (Updated) 9 Best Speedball Paintball Guns of 2022 | Guide & Reviews
Pingback: 8 Most Powerful Paintball Guns 2022 | Buyer’s Guide & Reviews (Updated)
Pingback: The Ultimate Woodsball Guide Exposed | 2022 Updated